")
Happy Color Snack Sunday, friends!
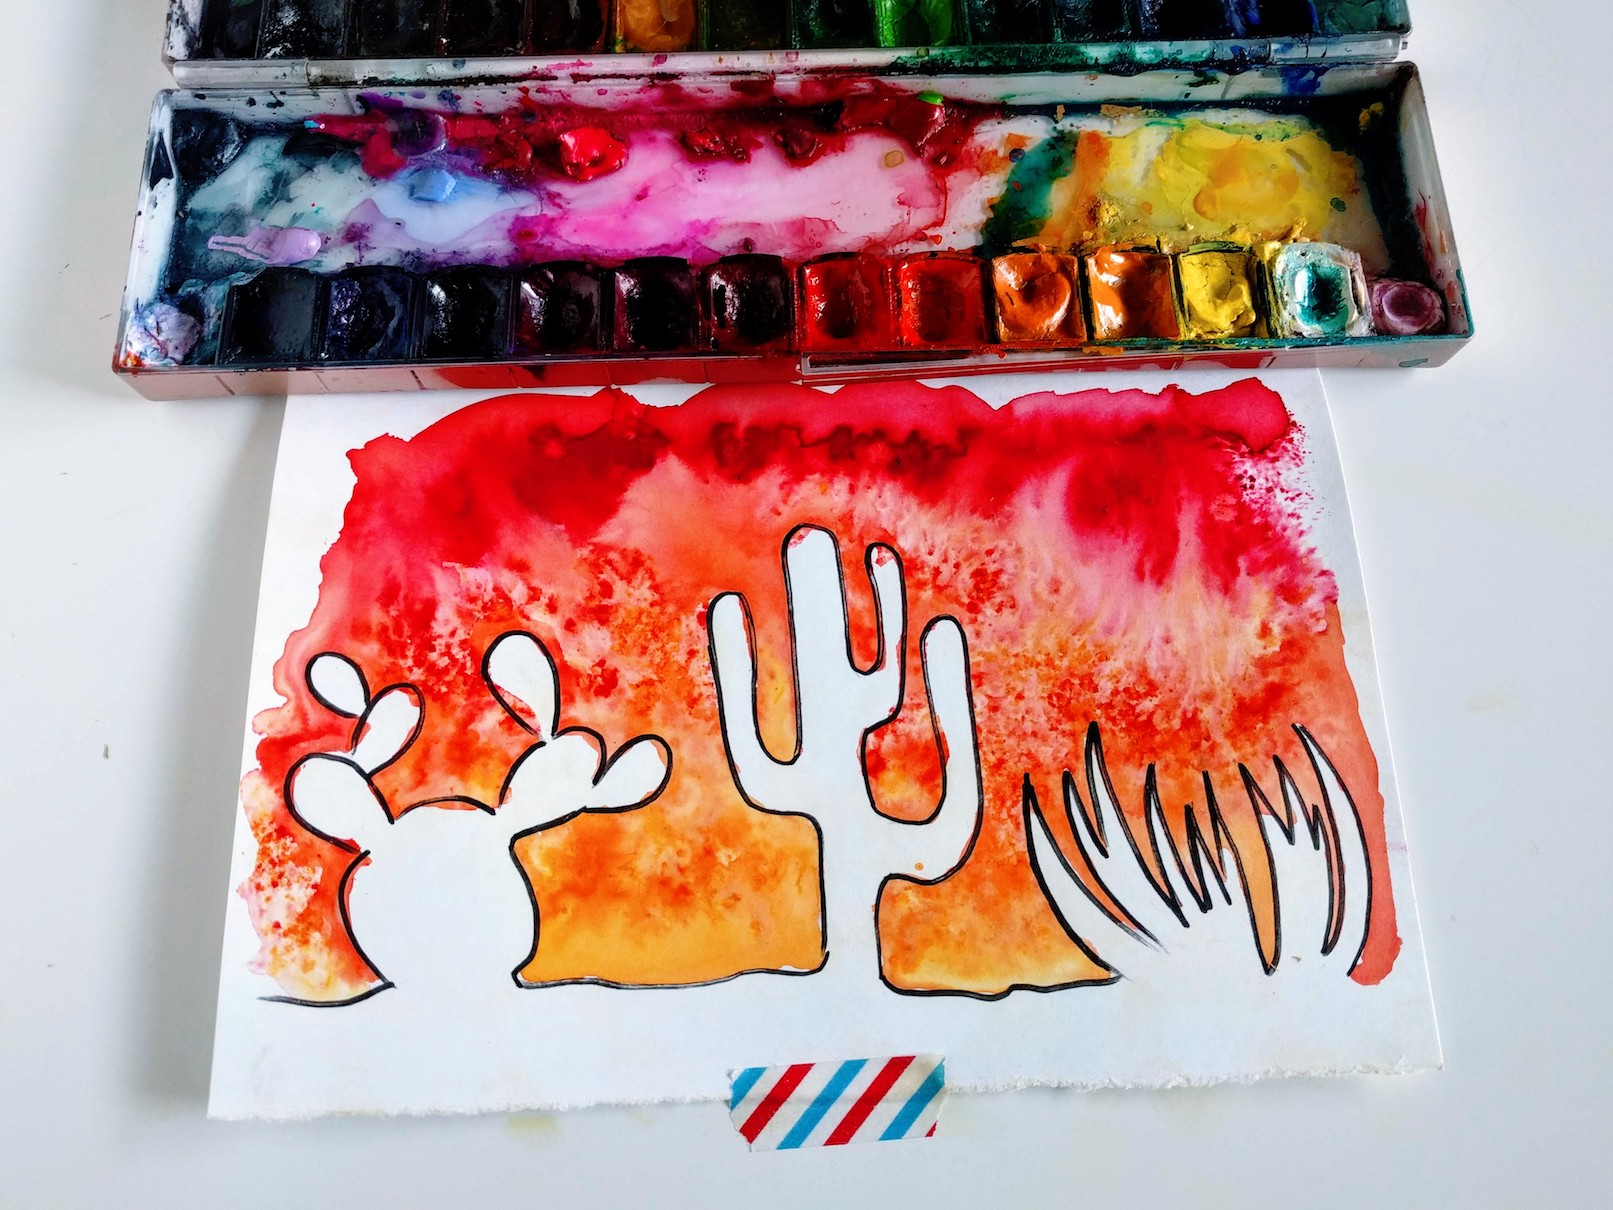
Today, we’re bringing the previous 3 cactus tutorials together in a little landscape composition sketch. Unlike actually painting the watercolor cacti shapes, we will be filling in the background so it creates a nice negative watercolor painting using brusho crystals (https://amzn.to/2zkOdqQ)
You can find the first and second and third parts of the Watercolor Cactus Paintings for Beginners series. Or check out my YouTube playlist with all of the videos.
Just a reminder, this watercolor cactus paintings series includes tutorials on how to sketch 3 different types of cacti, all using the watercolor brusho powders.
Happy Sketching!
(some of these posts may contain affiliate links, which are at no extra charge to you, but help me keep running this blog)
Watercolor Cactus Painting Series – Simple Cactus Landscape With Brusho Crystals Quick Instructional Video
Watercolor Supplies:
-
- brusho powder watercolors
- Bristol paper
- Water brush
- Pencil for a quick outline sketch
- Paper towel/towel
- Reference photo of a saguaro cactus
- Your creativity
Let’s get to sketchin’!
How to Paint a Watercolor Cactus Landscape Using Brusho Crystals
A quick note about brusho – if you’re not familiar with these powders they are pretty much magical and I hope you get some to play with because they are so much fun. They are essentially watercolor paints ground up into a powder that you can create different effects with. I often like to play with brusho to relax or unwind because they are so freeing and unpredictable.
Step 1. Start sketching your cacti shapes.
Begin your sketch drawing out the zebra cactus. You can refer back to my previous post on how to sketch a zebra cactus.
By the way, I am doing these brusho paintings on bristol paper because I like how resilient and smooth it is. And it’s perfect for these sketches. But your standard watercolor paper will work as well.
Step 2. Add the saguaro cactus shape.
You can extend the line of your first cactus sketch to form the ground and then continue that line to shape the saguaro cactus. Refer back to this tutorial on how to sketch a saguaro cactus.
Step 3. Add the third cactus – the prickly pear
Finally, sketch out your prickly pear cactus in a similar way like you did in a previous cactus tutorial.
Step 4. Start adding water
With a wider brush to cover the area quickly, start adding water to the background or the negative area of your sketches. Because this is bristol paper and not technically intended for watercolors, the paper might warp a little. I used tape to help it stay flat.
Step 5. Start adding brusho watercolor crystals
Start by shaking some of the brusho onto your shape. I am adding red at the top, orange in the middle and yellow at the very bottom to create a sort of watercolor gradient for our sunsetting dessert landscape.
Step 6. Outline your cactus shapes
First, outline the shapes with a small brush to correct any inconsistencies.
Next, be sure to let your sketch full dry before outlining the cacti shapes with a marker or black pen. You could also leave it without outlines but I found that it gives it a nice pop and you can also course correct some of the lines that you weren’t happy with.